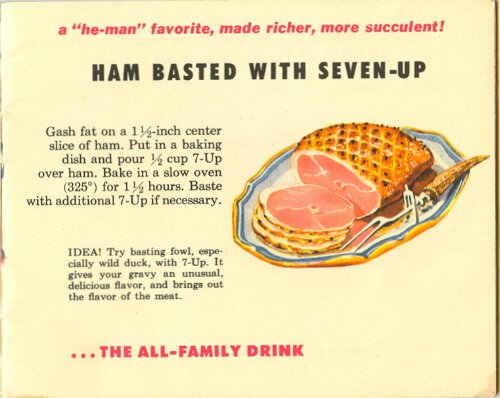
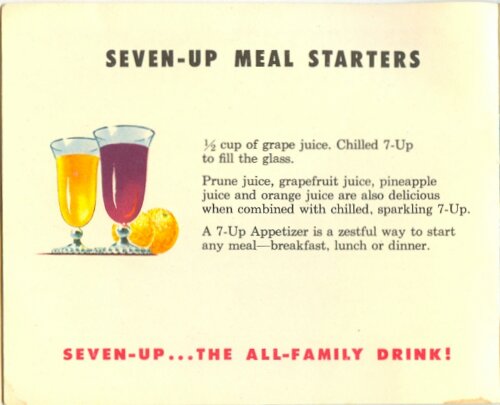
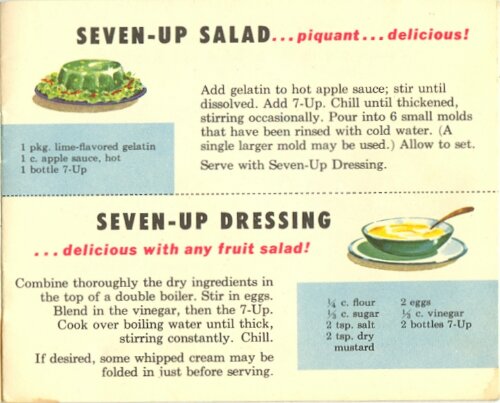
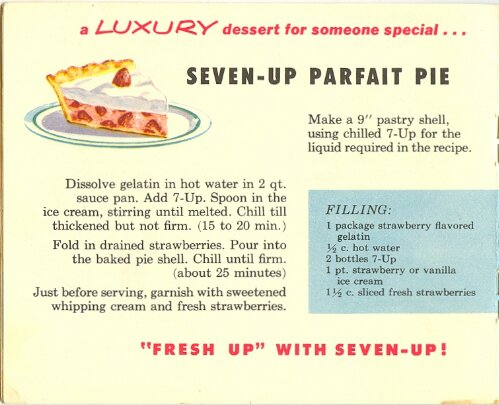
7-Up Recipe Book from 1953

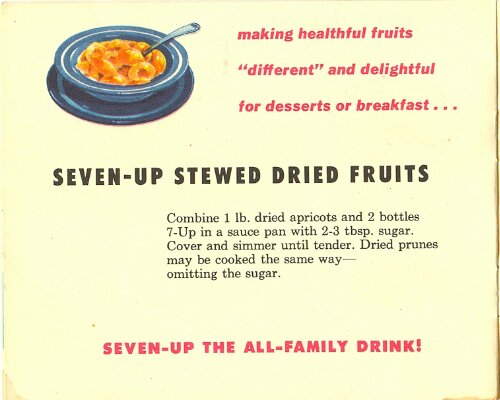
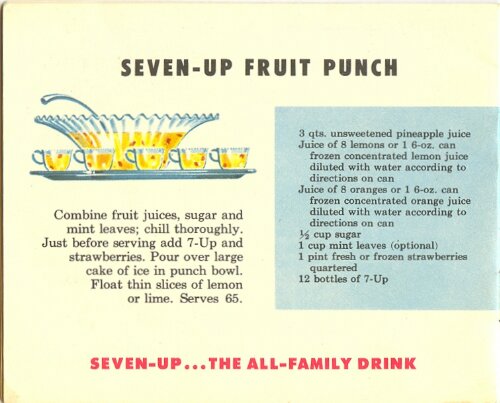
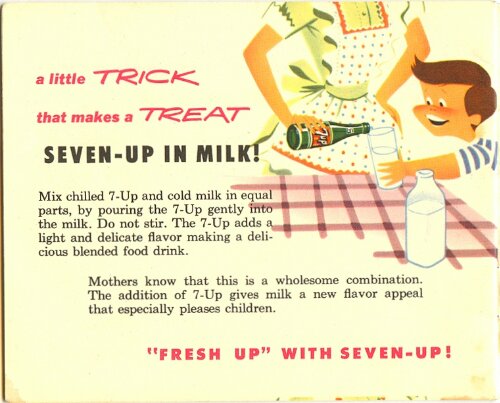
Saw this on Retronaut and had to put it up for my readers. Too quirky not to pass on. Seriously, check out that dressing! Weird. (Not nearly as weird as 7-Up in milk, though.)

Some of these are old standards, like 7-Up cake & 7-Up gelatin. Familiar territory for most southerners (seen those on many, many potluck dessert tables.)

image
image
image
image
image
image
image
image
image
image
image
image
image
image
image
image

As previously noted, all credit to Retronaut for
all images. Check them out sometine. Lots and lots of historical photos.

Final thought:try subbing 7-Up for beer in a typical beer batter. Works great for fried desserts. Some fish as well (gotta spice it up to cut the sweetness though.)

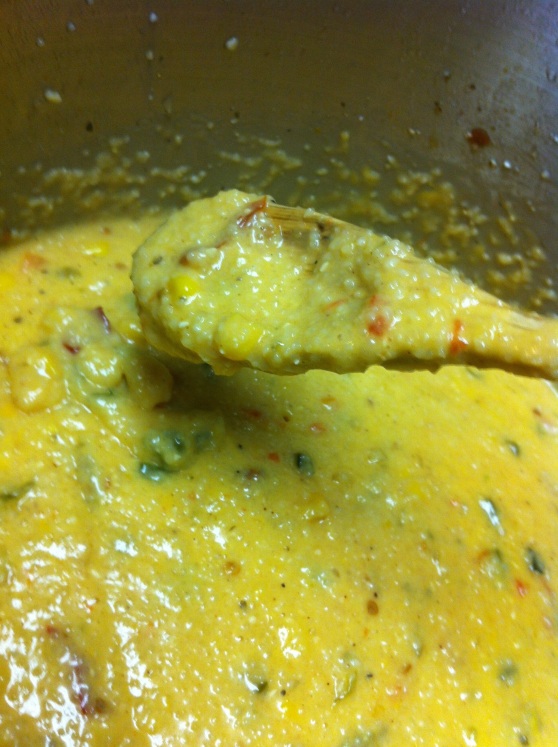
Southwestern Grits

20130411-034026.jpg

By popular request, here’s my recipe for Southwestern Grits. (This recipe feeds an army, better grab the “big pot.”)

Ingredients:

2 1/4 Cups of Uncooked Grits

1 Can of Chicken Broth (49.5oz)

2 Cans of Chicken Broth (8oz)

1 Can Evaporated Milk

1 Can Rotel (Drained)

1 Can Corn (Drained)

1/2 Can of Chipotles in Adobo (Minced)

1 Bell Pepper (Seeded and Chopped)

1 Medium White Onion (Chopped)

1 Poblano Pepper (Seeded and Diced)

1 tsp Kosher Salt

1 tsp Cracked Black Pepper

4 tbsp Butter (Divided)

1/2 tsp Garlic Powder

1lb Shredded Cheddar

1/2 cup Whole Milk to Thin (if needed)

Start with your pot on medium head an melt 2 tablespoons of the butter to coat the bottom. Saute the green pepprer, poblano, and onion until softened. Bring the heat to medium-high and add the rotel, corn, and chipotles in adobo. Continue to saute until fragrant (about 5 minutes.) Pour all three cans of the chicken broth into the pan and make sure to to scrape up any browned bits on the bottom. Add the evaporated milk, salt, pepper, garlic powder and the remainder of the butter and bring the pot to a boil. Once boiling, hold the pot at a boil for 5-7 minutes before adding the grits. Cook grits according to package directions. Once they have cooked completely you might need to add up to a 1/2 cup of whole milk to achieve the consistency you desire. Lastly, mix the cheddar in one palmful at a time until incorporated. Serve immediately.

Fat Back and Hog Jowls

For the life of me, I haven’t been able to figure out why Fat back and Hog Jowls haven’t taken off in popularity in the last few years. With the onset of “Bacon Mania” (see http://en.wikipedia.org/wiki/Bacon_mania) and the resurgence of “discarded bits” and “offal-centric” cuisine, one would think that it’s a match made in porky heaven.

Lets start of with the basics. Unbeknownst to most people “bacon” can refer to different cuts of pork in different parts of the world. Essentially, the only thing that binds them together is the fact that the majority of things called bacon have been smoked and cured. Bacon, as we know it in the U.S. is typically made from smoked and cured pork belly. But quite a bit of other “bacons” are readily available here in the states.

Example 1: Fatback.

Fatback. Image Credit: Ryan Adams via http://www.chefs-resources.com

Fatback is smoked and cured adipose tissue (subcutaneous fat) from the back of the pig. As it’s name suggests it is mostly fat. Occasionally however, it can include some rind (skin) or meat (back bacon) in it as well.

Fatback is most commonly used as a flavor enhancer (drop it in a pot of peas, collards, etc.) But, I do know people that pan fry it and eat it like belly bacon. (If there’s rind attached, be prepared for it to be quite chewy.)

To be honest, I’m not a fan of the pan-fry fatback method. It produces a ton of grease, is extremely salty to the taste, and can burn quite quickly. I think fatback really shines as a “toss in the pot” ingredient. All that goodness that cooks out of the fat marrys well with something with a high starch content like a big boiler of dry butter beans. The beans will soak up that cooked-off grease and salt and give the beans a nice salty, smoky, pork flavor.

I flip flop my opinions for hog jowls. I think “toss in the pot” with them is a big waste. Here’s why:

Hog jowl is exactly what it sounds like. It’s the smoked cheeks of the pig. It’s often overlooked because most people are turned off at the thought of eating the cheeks of an animal. (I usually laugh at people like this every time they eat a hot dog or a chicken nugget. I’ll let you Google that and find out why.) I think a lot of it has to do with the mental picture of someone slicing a hunk off of the head of an animal and making you eat it. Most Americans don’t want to know where their meat comes from, and don’t like to think about the fact that the meat they eat used to be part of an animal. But at some point, “animal” turns to “meat” and winds up on a grocery store shelf in a nice vacuum sealed package. Then we’re okay with it.

So, just for those squeamish people, here’s a picture of uncooked hog jowl.

Smoked hog Jowl

Smoked Hog Jowl. courtesy: http://www.earthydelightsblog.com

Holy crap! It looks like bacon! Amazing! It’s not a horror show after all!

Now that the hard part is over, lets get down to business.

I’ll just come out and say it. Hog jowls make the best damned bacon you’ve ever tasted. It’s thick, highly smoked, and moderately salty. The outside is crunchy, the inside is chewy and there’s just enough fat to make it have that luscious bacon flavor that drives people nuts.

I cook it just like I cook my belly bacon. In the oven.

Single layer it on a sheet pan, pop it in a 400 degree oven, and turn it every 10 minutes until done. It’s magical. (Some folks brush a little oil on the top of the jowl before putting it in the oven the first time. I’ve never tried it. It’s a little bit of “gilding the lily” for me. But they swear it helps the “outside crunchy/inside soft” texture.)

After it’s done, this is what you get:

Lambert’s Cafe Hog Jowls – courtesy: http://www.gypsynester.com

Looks awesome, right? It is. I’ve had that exact same meal at Lambert’s Cafe in Foley Alabama. It was bacon perfection.

Boiling this stuff absolutely kills it’s potential. I don’t boil hog jowl for the same reason that I don’t boil belly bacon. If you boil it, you’re ruining a great piece of meat. If you just want to add flavor to a boil, use fatback. You’ll get a lot more flavor “boiled out” and you won’t ruin the crunchy-chewy goodness that is jowl meat.

On a parting note, both fatback and hog jowl are a great way to keep moisture in roasted poultry or game birds. Spread slices of either across the top of the bird before slow roasting, and the fat will baste the bird as they both cook.

I hope you’ve enjoyed our look at a couple of oft neglected southern favorites.

Till we meet again.

TST

Low Country Boil


The Boil Plate

Typical Boil Plate

It’s that time of year again. The time when the glitz and glamor of the holidays has finally subsided. No longer do we crave chestnuts roasting on an open fire, or dream of a fat elf wiggling down our collective chimneys. Gone are the heartwarming thoughts of snow covered pine trees, or being bundled up to watch New Years Eve fireworks. The doldrums of Old Man Winter’s season has finally arrived.
The cold weather that bites at us on an almost daily basis (this is the south, after all) is now more an annoyance, than something to be looked at with reverie. We have no purpose for this cold now, no Thanksgiving to look forward to. No Christmastime cheer to lighten our hearts when facing temperatures that plummet. No reason to be bundled up all “cozy and warm” with good cheer to spend toward our fellow man.
But, we do have one thing.

Now every good southerner, boy and girl, young and old, tall and small, lie down at night and dream of one thing. The thing that gets us through these cold days better than any. The yearning and pleading that starts it’s prophetic rise on January 2nd, and burns within us like a fire that cannot be quenched. United in purpose, we suffer on though these cold months, with only one goal in mind:


We’re ready to go to the BEACH!
We’re ready to fry our bodies on the UV drenched, man made, sugar-white sand beaches of the southern coast! We’re ready to swim in jellyfish infested waters! We’re ready to visit tourist trap venues, and play putt-putt golf! We’re ready to drink canned beer (glass bottles are prohibited, you know!) We’re ready to eat over priced, over fried, previously frozen fish, all in the name of “supporting the local economy!”

Well, everything but that last part. I personally can’t stand some of the food found on the southern coastline. Mostly because the vast majority of the seafood in your “Admiral’s Basket” was “fresh caught from the freezer section THIS VERY MORNING!” Not to mention the cocktail sauce came in a five gallon bucket from Kraft Foods!

“So,” you must be saying to yourself, “Mr. Holier-Than-Thou blogger, what do YOU like to eat at the beach? What Suits YOUR fancy?”

I prefer my seafood boiled. More specifically, I like Low-Country Boils (as if you already haven’t figured that out, by now).

And I especially like having them now, when the weather is cold (makes me think of warmer climes, you know?)

The perfect one-pot-wonder that is as versatile as it is easy to prepare. Make it outdoors with a giant pot and a propane fish cooker, or make it indoors in a boiler with a stove top. Feed 5 or 50 make it mild, medium, hot, nuclear, melt-my-face-off or whatever suits you.

Now, to the uninitiated, cooking a boil may seem like a huge undertaking, that takes skill, patience, and years of practice. In truth, all it takes is know how to chunk things in a pot, at the right time, without boiling it over. (And a little common sense for good measure.)


Low Country Boil

*The traditional recipe calls for The pre-boil ingredients, potatoes, corn, sausage and shrimp. Please note that ingredients for this dish are not based on certain amounts. However they are based on how much you and your guests can eat. I usually account for two potatoes, one piece of corn, one piece of sausage, and 1/4 pound of shrimp per serving.

The following table represents ingredient ideas as well as approximate cooking times.

Pre-Boil Dry Crab Boil (2 tsp/liter)Liquid Crab Boil (1 tsp/liter)

Crab Boil-In-Bag (2 tbsp/liter)

Lemon Wedges (1 wedge/liter)

Fill pot to just over 1/2, add spices and bring to boil. I split the boil-in-bag open, and let the spices in it boil out in the open. Once cooked, the seeds and spices coat the seafood, and make a tasty addition to the finished product. Be aware that liquid and dry crab boil is very potent, and quite spicy. If some people would like a spicier boil, see my note below. Make sure to account for the amount of total ingredients you’ll be placing in the pot. Remember, it’s much easier to add water (if there’s too little,) than take away (if there’s too much)
Stage 1 Red Potatoes (Of similar size) Add to boiling water. Return to boil, and cook for 20 minutes (small potatoes) or 30 minutes (larger potatoes), or until potatoes are almost fork tender.
Stage 2 Cased Sausage (cut into links)

Corn-on-the-Cob (small cobs)

Mushrooms

Onions (pearl, or wedged)

Whole Garlic Cloves (peeled)

Add to boiling water. Return to boil, and cook for 10 minutes.
Stage 3 Shrimp

Crawfish (burped)

Crab

Mussels

Clams (bearded)

Small Whole Fish (prepared)

Add to boiling water. Cook based on cooking time for individual item.Shrimp: 5 min

Crawfish: 5min

Crab: 10-15min

Mussels: 5-7min

Clams: 6-8 min

All said, you want your boil to cook for between 35 & 45 minutes based on the thickness of your potatoes, and the stage three items you want to add. (Planning ahead, and doing a little cooking time math sheet will go a long way in having a successful boil.

One the boil is over, allow the items to cool in the pot for at least 10 minutes. This is called “resting” and allows the stage three items a chance to absorb some of the seasonings that are floating on the top of your boil water. This is also the time to have a side pot ready for those who would like spicier seafood.

To make a side pot, pre-boil a mix of liquid and dry crab boil in a smaller side pot, and use double the standard proportions (or more if you know what you’re doing.) Then, once the boil is finished, transfer the seafood that needs to be spicier to this pot, and allow it to rest in it. The heat will ramp up significantly, based on the amount of seasoning you use.

Finished Boil

The Finished "Stove Top Boil"

Serve with my “Better than the Bottled Crap” Cocktail Sauce:

3/4 cup Ketchup (more/less for spicier/milder sauce)
2 tbsp Prepared Horseradish
1 tsp Tabasco Sauce
1.5 tsp Worcestershire Sauce
1/2 tsp Old Bay Seasoning
Juice of 1/2 of a medium lemon

Mix, chill and serve.

As a final note, The traditional way to serve (when outdoors) is to drain the pot, spread out old newspapers on a table, and dump the whole lot in the middle. However, I find that straining ladles, and paper plates work just fine. Just, omit the plastic ware. You are supposed to be on the beach, remember? Just eat with your hands, and dream of July.
West Indies Salad

West Indies Salad: Courtesy Tie Dye Travels @ Blogspot

No, that’s not a typo. This article is about “West Indies Salad.”

Wait! Don’t leave! I promise we haven’t had a format change!

Believe it or not, this is a southern recipe. “West Indies Salad” is a regional favorite dish of the coastal lowlands, especially in Alabama. The dish is a success story of how a restaurateur can profit from an overabundance of ingredients when combined with a clever marketing strategy.

In 1947, Mobile, Alabama restaurateur Bill Bayley, combined his love for Cucumbers and Onions marinated in oil & vinegar, with the plentiful supply of blue crabs that make their home on Alabama’s beautiful gulf coast. Heralded in legend as the first man to batter and fry blue crab claws into the miniature drumstick-esque finger food that is sold coast-to-coast in the US today, Bayley needed more dishes to make use of the lump meat. The popular, if not cliche, mayo-based crab salad, and crab omelet (a transplanted staple of the Louisiana coast,) were sold by every self-respecting seafood shop in the low country. So Bayley combined the crab meat with cider vinegar, onion, oil and cold water, and named his concoction “West Indies Salad.” Evoking the idea, in the minds of his customers, of this dish’s root as a byproduct of the exotic West Indies.
Bayley’s customer’s were head-over-heels for it. They bought into the mindset with fervor, and made the dish as famous as its namesake. Soon, restaurants across the southeast were copying it, and cementing it into the culture. It ceased to be a proprietary dish, and became a staple.

Now, 63 years later, it’s still one of the most popular dishes at southern seafood shacks, and considered to be a measuring stick by which they are measured. Oddly enough, “West Indies Salad” is one of the few dishes in my travels that hasn’t been modified very much. It’s very rare that a dish survives this long without someone changing the ingredients, or adding to the base recipe. The simple salad, stays the same, spanning the generations. The only variable’s I’ve ever noticed is the occasional inclusion of lemon, the change in marinating time, or the modification of ingredient ratio (which usually does nothing more than making the dish a bit wetter or drier.)

West Indies Salad

1 small Vidalia onion, peeled and diced
1 lb. jumbo lump crabmeat (watch for shell pieces)
Salt and freshly ground black pepper
1⁄2 cup vegetable oil
6 tbsp. cider vinegar
1/2 cup of ice cold water


Mix all ingredients in a non-reactive bowl, and refrigerate.

To achieve the optimum combination of sweet, acidic, and aromatic flavors, the marinating process is a must. However, depending on how long you marinate, the flavor of the salad can be altered to suit your preference Two hours is the bare minimum. This minimizes the onion flavor while bringing the acidic bite of the vinegar out to counteract the crabs sweetness. Twelve hours mutes the vinegar slightly, while bringing the onion to the forefront. A full day marinade is the most balanced as far as the onion and vinegar go, but the crabs sweetness tends to get lost.

Serve cold, with saltine crackers, and a glass of sweet tea.

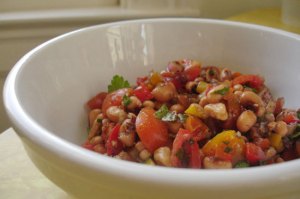
Alabama Caviar

Alabama Caviar

Alabama Caviar - Image Courtesy: teamsugar.com

Here’s a quick, simple, recipe for Alabama Caviar (or black-eyed pea salad if you must.) It’s full of bright, bold flavors that fit in perfectly well at a picnic or a summer covered-dish dinner. There are probably hundreds of recipes out there, but I made this one with a few special ingredients that give it a twist. It’s simple, healthy, and relatively inexpensive.

Ingredients:

4 cans Black-Eyed Peas, Drained and rinsed
1 can Whole Kernel Corn
1 pint Grape or Cherry Tomatoes, Halved
1 Jalapeno, Minced
3 Bell Peppers, Chopped (I use Red, Yellow, and Orange)
½ Medium Red Onion, Chopped
1 Small Handful of Cilantro Leaves, Roughly Chopped
1 Jalapeno, Seeded and Minced
5 pods Mild Pickled Okra, Ringed
½ bottle Zesty Italian Dressing, Large Size (24oz)
1 tsp Balsamic Vinegar
1 tbsp Cayenne Pepper Sauce
½ tsp Garlic Powder
½ tsp Salt
½ tsp Black Pepper

Directions:

Prep all ingredients and mix in a large bowl. Let rest, covered, in the fridge for at least 12 hours. As with any marinated salad, chili, soup or stew, the old adage holds true: “The longer it sits, the better it gets.”

Spicier:

For a spicier dish, add 2 more Jalapenos, sub the mild pickled okra for hot, and increase the hot sauce amount to 3 tablespoons.

Serving:

Serve as a dip with corn chips or serve on toasted bread (for a southern style bruschetta.)

Grilled Sweet and Spicy Bacon

Grilled Bacon

Grilled Bacon

I had the guys over the other night, and decided to debut a variation of one of my favorite things to cook.

Bacon.

But not just any bacon, mind you. Wright brand bacon.  (It’s bigger than double thick, and always perfectly balanced with fat and lean)

My favorite way to prepare bacon for that “special occasion” is to caramelize it with brown sugar, but in all honesty, brown sugar was never enough. Simply because you can pick up brown sugar bacon just about anywhere (though it won’t caramelize like mine.) So how do we make it something special?

Ground Cayenne.

Specifically I use a 1 to 4 ratio of ground cayenne to light brown sugar (1 tsp. of ground cayenne mixed with 4 tsp. of brown sugar.) Under normal circumstances I cook it in the oven (recipe follows), but the other night, I had an epiphany.

What could make sweet and spicy bacon even better?

Charcoal.

Man, was I ever right! That subtle, earthy, taste of open flame charcoal grilling took a great dish to a whole new level. Though, grilling the bacon was a bit challenging due to flareups.

Here’s both of the recipes, just in case you’re interested:

Caramelized Sweet and Spicy Bacon

8 Slices Double thick cut bacon (I prefer Wright brand)

4 tsp. Light brown sugar

1 tsp. ground cayenne (adjustable to tolerance)

Preheat the oven to 400 degrees. Place the bacon on an non-stick sheet pan in a single layer, leaving a little space between them. Combine the brown sugar and cayenne pepper in a bowl and sprinkle liberally over each slice of bacon (I use about 1/2 tsp per slice.) Pat the sugar mixture flat, and place the sheet pan in the oven for 15-20 minutes, or until the bacon has colored just slightly darker than caramel. The bacon will still be quite soft when it comes out of the oven, but will stiffen when it cools slightly.

Now, as far as grilling goes…

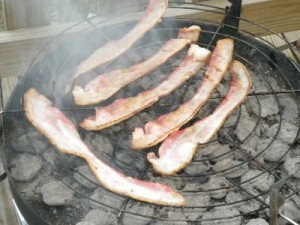
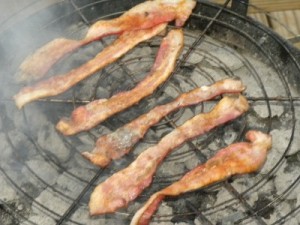
The procedure stays mostly the same, however you must be aware that grilling bacon will result in many flareups. So, it’s a good idea to keep a squirt bottle nearby to knock down the flames. Also, indirect grilling seems to work best (high heat causes scorching), so shift the coals over to the OTHER side of the grill from where you intend place the bacon. My best results came from racking the bacon perpendicular the rails of the grill surface, turning once during the grilling process. When the bacon is fully cooked, but still limp in consistency, remove it from the grill surface and place it in a sheet pan, (just like if you were making it in an oven.) Sprinkle the brown sugar mixture over it liberally (1/2 tsp per slice, as before), and since the bacon is hot, you won’t need to pat it down. Once the bacon is covered, return it to the grill surface, sugar side up, and let it reheat and darken in color. Pay careful attention to how the sugar is caramelizing, and note that if you take it off when it looks completely done, chances are it will scorch once it’s off the grill and in the pan (heat doesn’t dissipate immediately you know.) So remove it early, and it should brown nicely in the pan, as it rests.

I’ve included this photo as a good guide to know when to pull the bacon off of the grill.

Grilled Sweet and Spicy Bacon

Grilled Sweet and Spicy Bacon

No known photos of the finished product exist.

I wonder why…

Pimento Cheese…?

Image Credit: "A Trip Down South"

…not “pimento cheese dip,” or “pimento cheese spread,” but “pimento cheese.” If you’re a non-southerner, and you want to ask a dyed-in-the-wool southerner what this much revered dish is, make sure you just refer to it as “pimento cheese.” “Dip,” and “spread” are only verbs to us. We find no need for an adjective to describe the proper procedure for using it. We’re quite well versed in it’s ability slather on, dip in, or dump over just about anything. We also don’t care that referring to the dish as “pimento cheese” is a complete misnomer. If you’re expecting a block of cheese filled with pepper pieces, go look for some pepper jack, you won’t find it here.

So what is this marvel of southern design? This versatile carrier in which half the things in your house would benefit from it’s unique taste? (Crackers, veggies, meats, the doorknob… whatever’s handy…)   Surely anything this good requires a full page of ingredients, hours of prep, and a lifetime of dedication to master it’s subtle nuances.

It’s sharp cheddar, mayo and jarred pimento peppers.

The base recipe is as follows:

8oz Shredded Cheddar Cheese

4oz Jarred Pimento Peppers (Drained)

1/4 Cup of Mayonnaise

Salt and Pepper to Taste

Mix all ingredients, cover and refrigerate for at least an hour to let the flavors meld.

Now, this may seem to be the epitome of backwoods, redneck cuisine. Especially to the untrained eye. But, believe it or not, a pimento cheese sandwich is THE thing to eat at one of the most prestigious golf tournaments in the world. The Masters, held every year in Augusta, Georgia. Only something so special, so southern, and so tasty, can not only appeal to the masses, but can appeal to those who could afford to eat it on a golden plate with a platinum knife. From golfers, to spectators, to sponsors, everyone lines up to taste the one of the simplest staples of southern comfort food.

But, they do modify the recipe slightly.

The Masters Pimento Cheese Sandwich (Makes two sandwiches.)

4oz Extra Sharp Vermont Cheddar (White or Yellow, Shredded)

3oz Jarred Pimento Peppers (Drained and Finely Chopped)

2 Tbs Mayonnaise

1/2 Tsp Hot Pepper Sauce

4 Thin Slices of Vidalia Onion

1 Cup of Watercress Sprigs (Stems Removed)

4 Slices of  White-Wheat bread.

Salt and or Pepper to taste.

Follow the base instructions for making pimento cheese (but remember to add the hot pepper sauce.) Once it has been well chilled, and the flavors have combined, spread pimento cheese evenly on bread. Top with onions and watercress sprigs.

As you can see, The Masters makes use of the base recipe and adds the flavors of red pepper, sweet onion and watercress. I would suggest that you experiment with other flavors as well. Jalapeño and garlic tend to be very popular additions in mass produced pimento cheese, and their flavors blend even better when incorporated into fresh pimento cheese.

Simplicity is the rule of the day when it comes to pimento cheese. It’s simple to make, simple to modify, and simple to serve. Therefore, I humbly suggest the next time you’re in the grocery store, bypass the Mrs. Stratton’s and try it the old fashioned way. The difference between fresh pimento cheese, and the pasturized, processed stuff that comes in a plastic tub will rock your tastebuds.

I’m pretty sure you’ll never go back.

Quick Recipes:

1. Pimento Cheeseburgers (Standard hamburger topped with pimento cheese)

2. Filled Veggies

Cream pimento cheese in food processor (add a little milk if too thick).  With a star tipped icing bag, pipe the puree into vegetables (pepper slices, tomato cups, celery ribs) Garnish with a dusting of minced parsley.

3. Southern “Canapés”

Top Ritz crackers, with thin Vidalia onion slices, cherry tomatoes (sliced into discs) and piped pimento cheese puree. Garnish with a small parsley sprig, or an olive ring.

Hoop Cheese

Image Credit: jacksonbros.com

Never heard of hoop cheese? Probably because it’s rarely available anymore. It’s a traditional farmers cheese, made by draining the whey from a cottage cheese then placing the curd into a round mold (the hoop) and pressing it out. Some are aged slightly to increase firmness, but the vast majority of hoop cheese produced is semi-soft. At one time, hoop cheese was a staple of southern cooking, and more widely available than any other type of cheese. Now, you’ll be lucky to find a wedge or two in you local supermarket. For two distinct reasons;

1. It’s hard to standardize the manufacturing process, and it spoils quickly.

2. It’s not the most flavorful cheese in the world (especially by today’s standards.)

Both of there reasons, in the minds of cheese producers, make it a product that’s not worth their time and effort.

But, for me to be writing this article, there must be some kind of redeeming factor. Right?

Of course there is!

Actually, not only is there redemption for this cheese, there’s also an explanation as to why it was NEVER mass produced, even in it’s hey-day in the deep south. Ask any southerner that was alive before 1960 about hoop cheese, and they’ll probably tell you that they bought it at a market, cut fresh off the wheel. Nine times out of ten, it was actually cut and weighed on a machine that was made specifically for store’s use.

Not only did the store cut it off the wheel, they probably made the cheese in the back-of-the-house. At the very least, someone in the nearby community made it, and sold it to the store for immediate sale. Because the cheese is a fresh farmer’s cheese, and spoils much quicker than the aged cheeses that the store could outsource and keep on hand. It will only keep for about a week or two after it’s been made, and cutting off of the wheel increases the surface area which shortens the spoilage time.  So it was in the best interest of the store to be able to get in in the door, and out the door, as quickly as possible with as few cuts as possible. I’ve included a picture of a hoop cheese cutter/scale machine below.

Image Credit: Wikipedia

Now, on to taste.

The thing that makes hoop cheese stand out among all the other cheeses in your dairy case, it it’s ability to impart a distinct creaminess to cheese based dishes, while keeping it’s flavor profile limited. I like to use it in combination with a sharp cheddar to offset the bite, and keep my dishes from becoming blocky or sticky. Not to mention, because it has a neutral flavor, it’s WONDERFUL when paired with fruits. It makes the sweet taste of strawberries or melons sing out while giving a firm creamy texture to the palette.

One of my favorite dishes to cook with hoop cheese, is  “Apple Cheese.” A casserole that normally pairs cheddar and apples, I add a bit of hoop cheese to give it a creamy texture:

Ingredients:

9 apples (peeled and sliced thin)

1 cup of flour

1 cup of sugar

10 ounces of cheddar cheese. (grated)

3-5 ounces of hoop cheese (grated)

1 sleeve of Ritz crackers (crumbled)

1/2 cup of melted butter

Simmer apples in boiling water until tender. Drain and place a layer in a buttered casserole. Combine remaining ingredients and sprinkle over apples. Repeat layering until all ingredients are used. Bake at 350 degrees, 35-45 minutes.

So what’s your best bet for finding hoop cheese?

Occasionally you’ll find it in a local supermarket. But, your best bet will be to find a farmers market. You might be surprised to find that in addition to the vegetables and preserves that frequent the market, local artisan cheese makers often make an appearance too.

Finally, if you’re feeling like worming your way into nouveau southern cuisine in your own home and want an easy recipe, try substituting the mozzarella in an insalata caprese with hoop cheese. Throw in a few good acidic heirloom tomatoes while you’re at it (I prefer a purple heirloom with a nice smoky bite.)